Getting Started
Quick Start
Step 1: Install a supported version of the Puppet Development Kit on your system (see Prerequisites for more information).
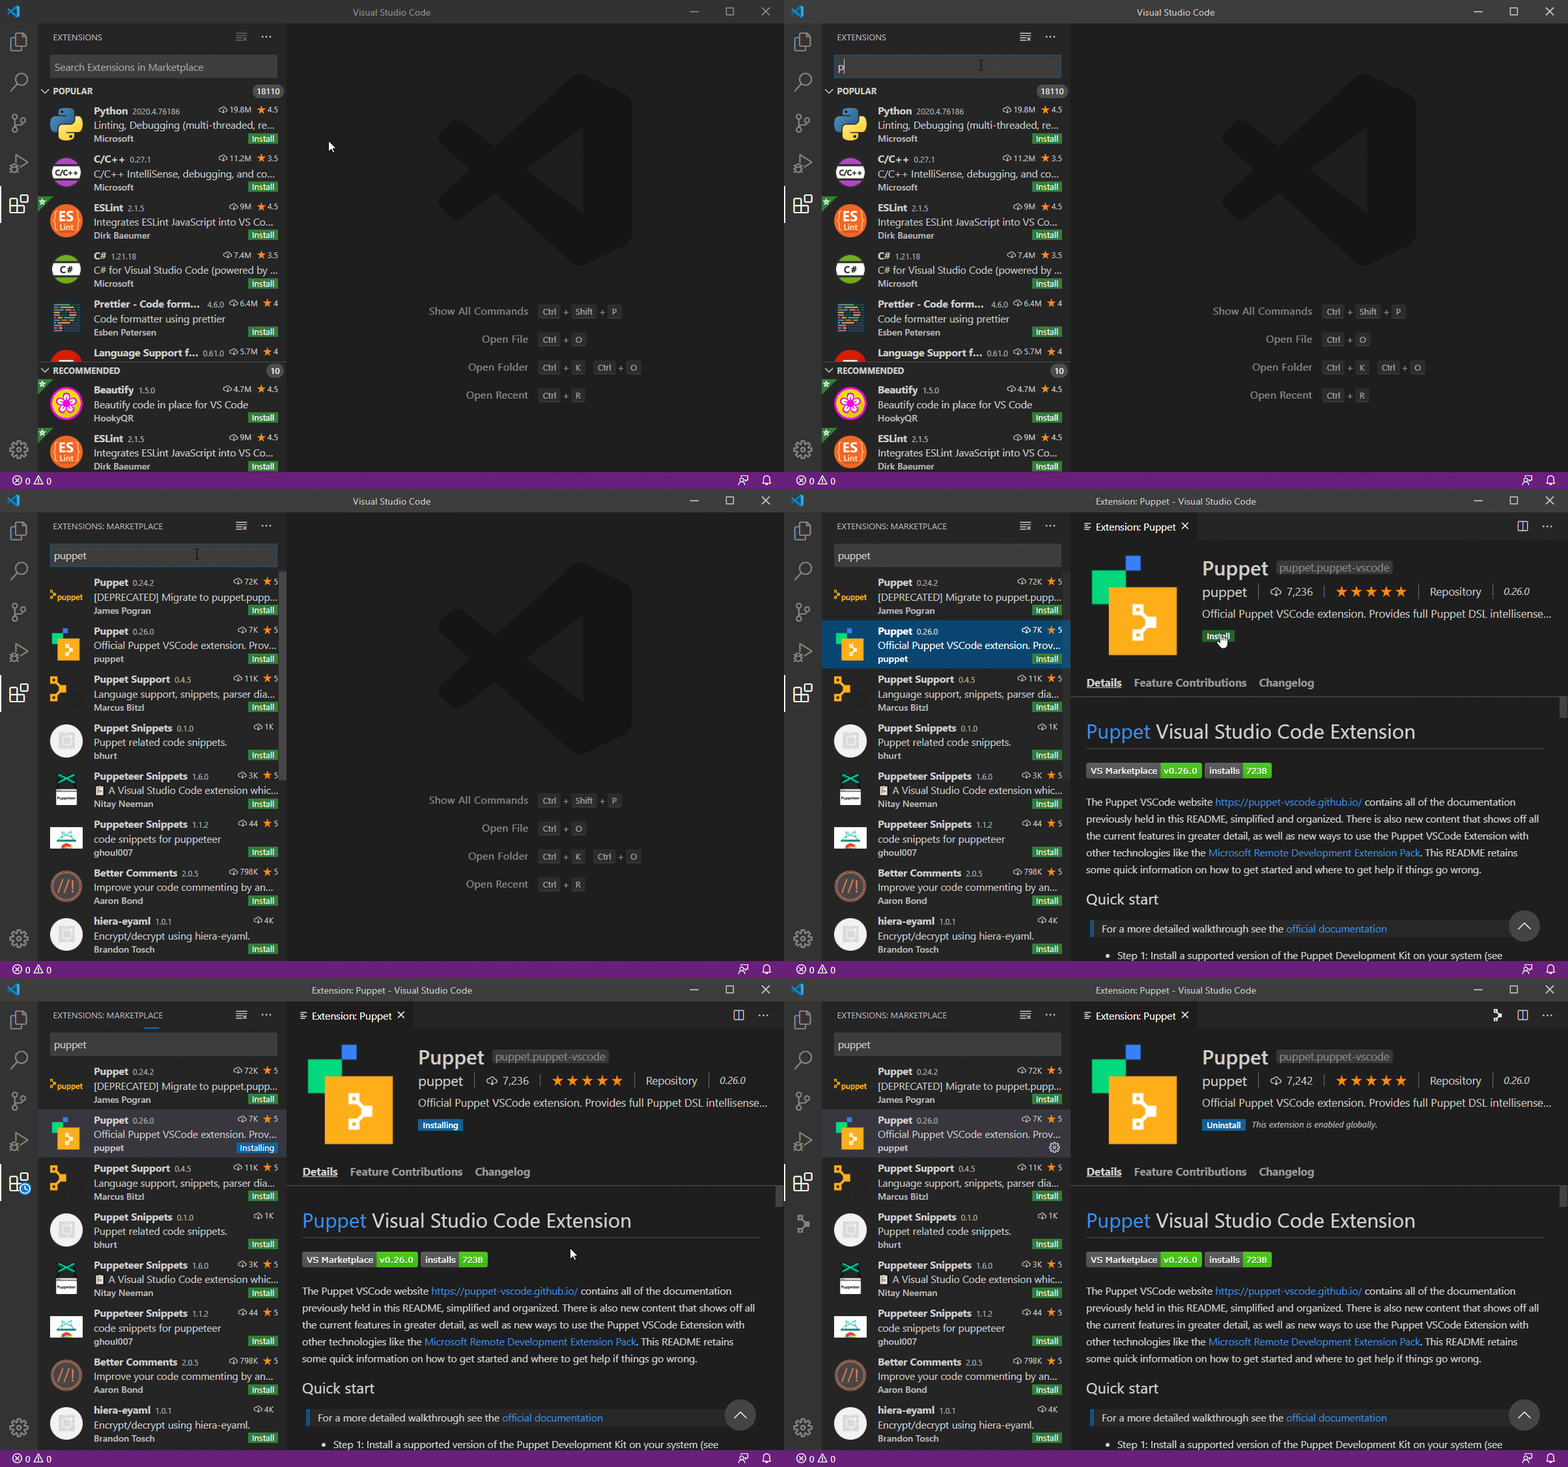
Step 2: Install the Puppet extension for Visual Studio Code.
Step 3: Open, or create, a Puppet manifest file (a file with a
.ppor.eppextension) or aPuppetfileand start automating!
Prerequisites
You will need to have the Puppet Agent or Puppet Development Kit (PDK) installed in order to fully use this extension.
You can find instructions and installation links here:
PDK
Note: PDK version 1.5.0 or higher is required.
Puppet-Agent
Note: Puppet Agent 5.5 and above is preferred.
Platform support
- Microsoft Windows
- MacOSX
- Linux
Installation
The VS Code Marketplace has many extensions, including the Puppet Extension. To quickly install the Puppet Extension, click on the Install button at the top of this page.
You can install the official release of the Puppet extension by following the steps in the Visual Studio Code documentation. In the Extensions pane, search for puppet-vscode extension and install it there. You will get notified automatically about any future extension updates!

You can also install the extension without access to the internet by following these instructions.
Setup
While the default configuration for the Puppet Extension will get you up and running quickly, you may want to tailor the configuration to your own liking. All of the available settings are detailed in the Extension Settings documentation. Now that you’ve installed the extension you may want configure
Automatic configuration
By default the extension attempts to automatically find a valid installation of the PDK on your system. If a PDK installation is not found, it attempts to find a Puppet Agent installation. The locations it looks for are the default install locations for each product. Exact default values for these locations can be found in Extension Settings documentation.
Configure extension to use PDK
To ensure that the extension uses the PDK, set the puppet.installType setting to the pdk value like so:
{
  "puppet.installType":"pdk"
}
The default installation paths stored in the extension are:
Windows:
{
  "puppet.installDirectory":"C:\\Program Files\\Puppet Labs\\DevelopmentKit"
}
OSX:
{
  "puppet.installDirectory":"/opt/puppetlabs/pdk"
}
Linux:
{
  "puppet.installDirectory":"/opt/puppetlabs/pdk"
}
To use a custom install path for the PDK, set the puppet.installDirectory setting to the path you installed the PDK to:
{
  "puppet.installDirectory":"D:/programs/pdk"
}
Configure Puppet Version in PDK
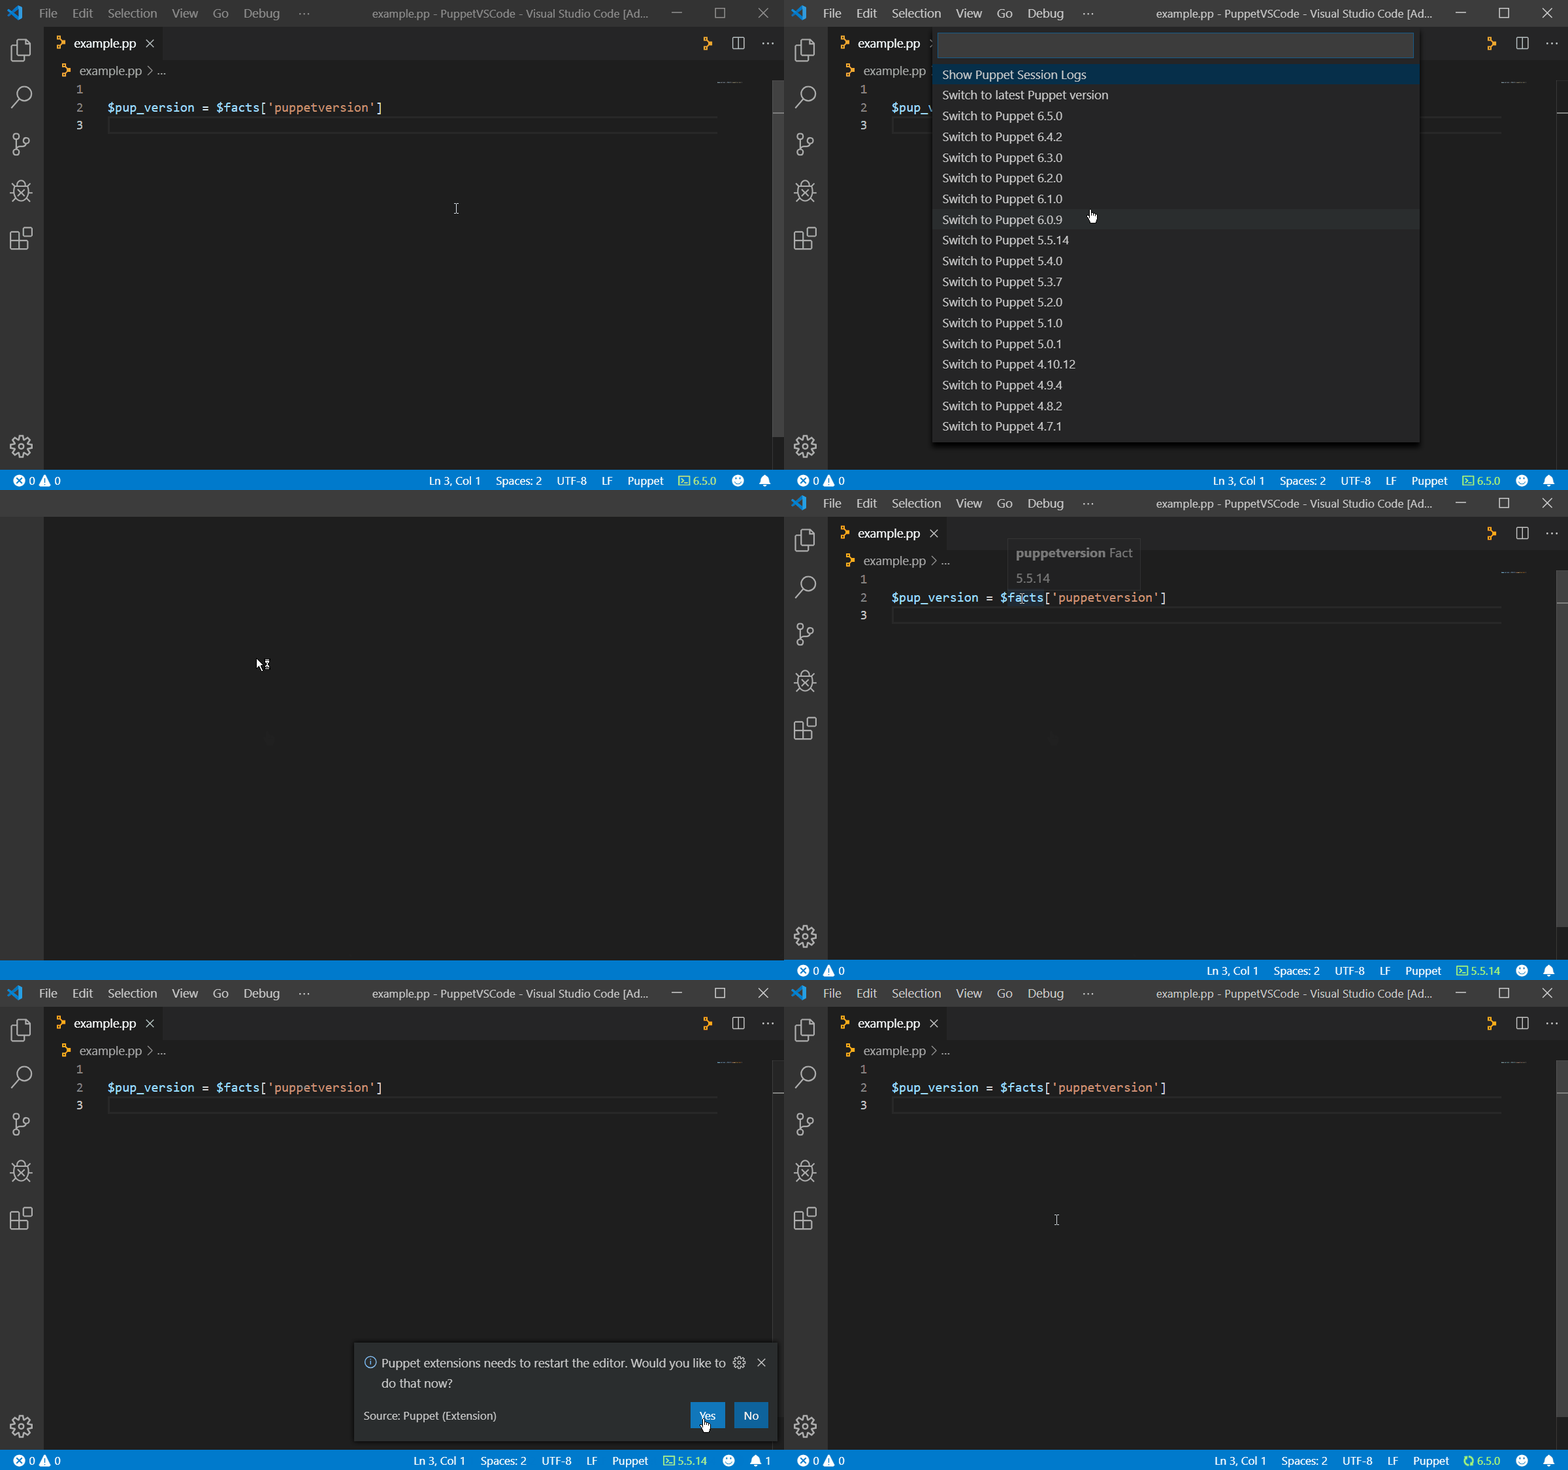
The PDK has many versions of Puppet which can be used. Set the puppet.editorService.puppet.version setting to the version you would like to use, for example, if you wanted to use version 5.4.0, then set the configuration to:
{
  "puppet.editorService.puppet.version":"5.4.0"
}
You can also change the version from the status bar in Visual Studio Code. Click on the Puppet version text in the status bar and then select which Puppet version you would like to use. Note that this will require Visual Studio Code to be restarted to take effect.

Configure extension to use Puppet-Agent
To ensure that the extension uses the Puppet-Agent, set the puppet.installType setting to the puppet value like so:
{
  "puppet.installType":"puppet"
}
The default installation paths stored in the extension are:
Windows:
{
  "puppet.installDirectory":"C:\\Program Files\\Puppet Labs\\Puppet",
}
OSX
{
  "puppet.installDirectory":"/opt/puppetlabs"
}
Linux:
{
  "puppet.installDirectory":"/opt/puppetlabs"
}
To use a custom install path for the Puppet-Agent, set the puppet.installDirectory setting to the path you installed the Puppet-Agent to:
{
  "puppet.installDirectory":"D:/programs/puppet"
}
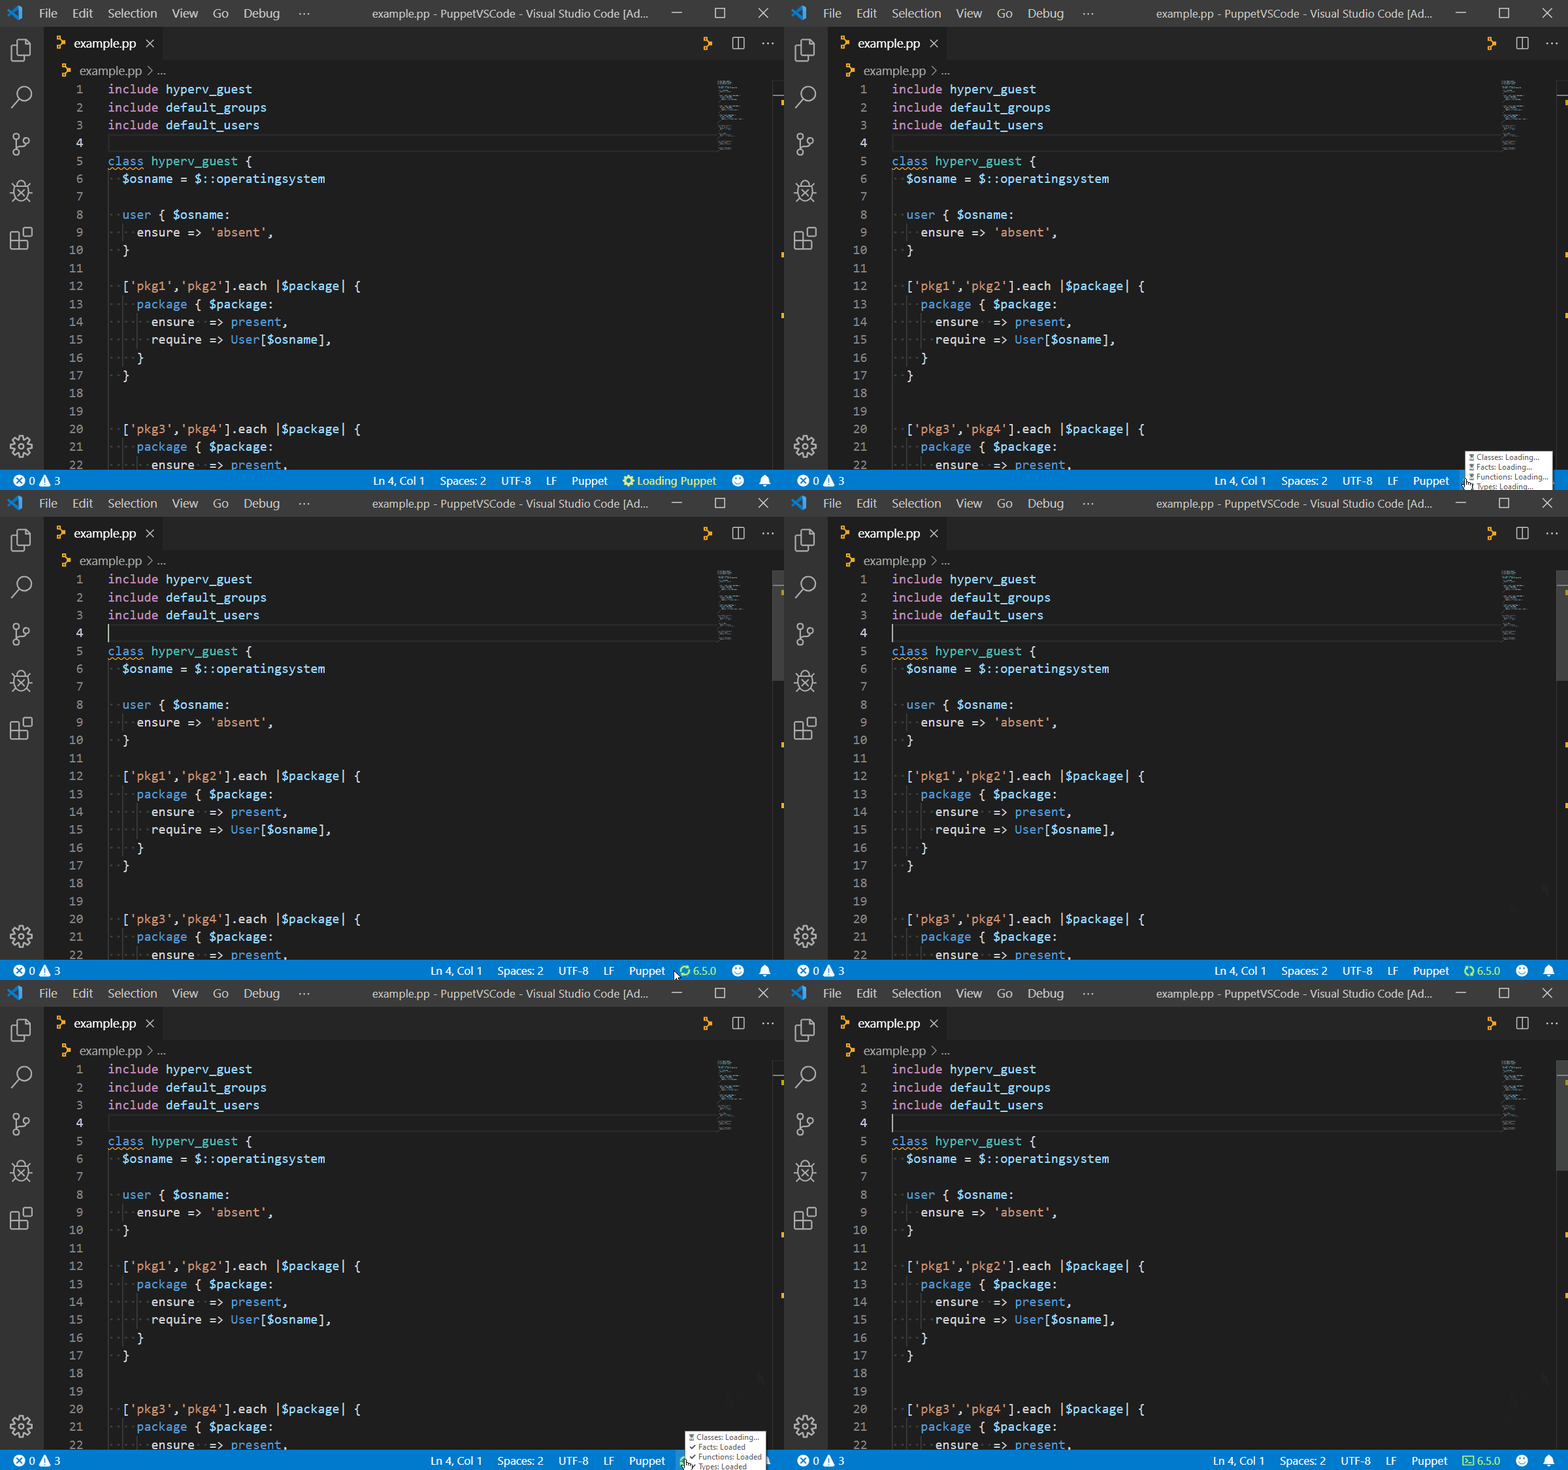
Loading indicator
The Puppet extension includes additional information in the form of a tooltip which describes the features that are loaded and still loading during startup.
